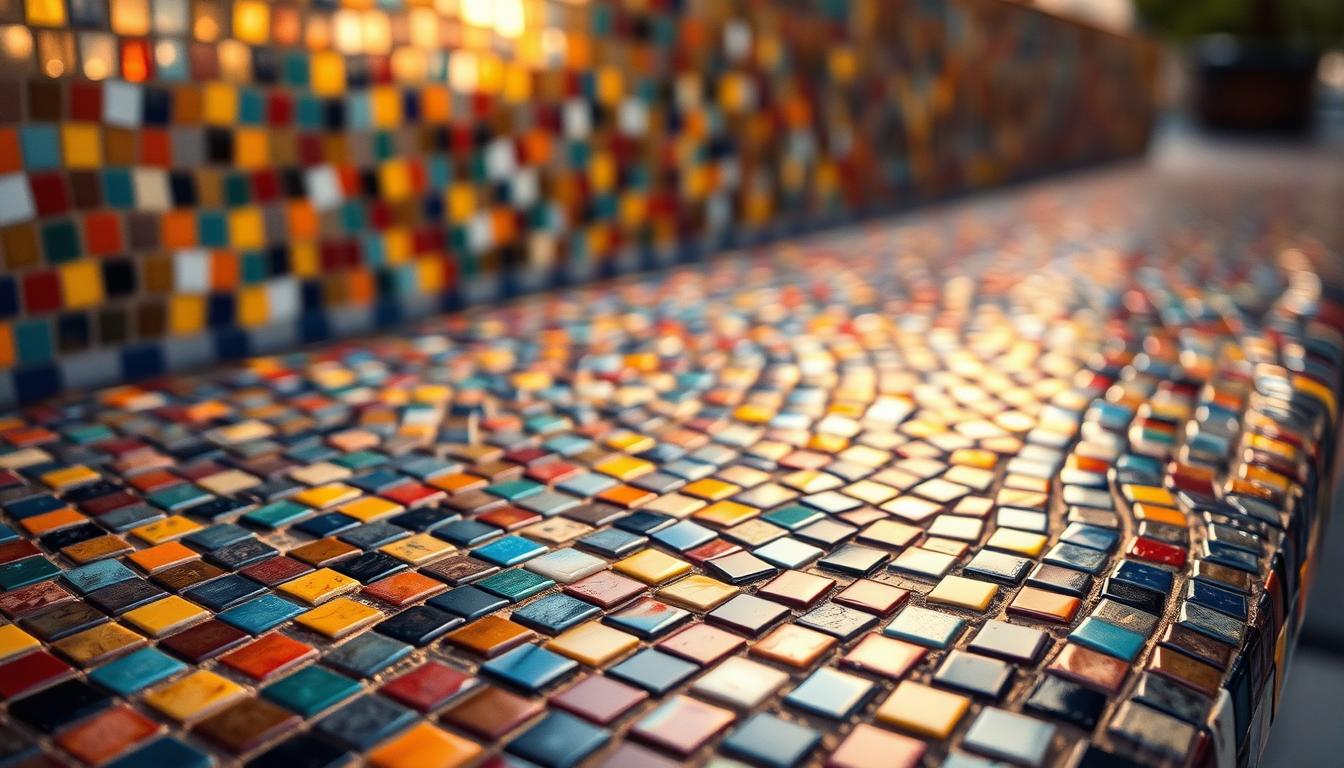
Creating beautiful mosaic art for outdoor spaces requires proper sealing to ensure longevity and durability against the elements. Outdoor mosaic projects face unique challenges compared to indoor installations, making the sealing process crucial for maintaining their appearance and structural integrity.
This comprehensive guide will walk you through the essential steps to properly seal your mosaic art, protecting your creative investment for years to come. Understanding the proper sealing techniques will prevent common problems like grout deterioration, tile loosening, and color fading that often plague improperly sealed mosaics.
Understanding Outdoor Mosaic Art and Why Sealing Matters
Creating a stunning outdoor mosaic art piece is just the beginning; protecting it from the elements is crucial for its longevity. Outdoor mosaics are exposed to a variety of harsh environmental conditions, including rain, snow, intense sunlight, and temperature fluctuations.
The Challenges of Outdoor Elements
Outdoor mosaic art faces constant exposure to elements that can cause significant damage over time. Moisture penetration is particularly problematic as it can lead to freeze-thaw damage in colder climates, affecting materials like grout, unglazed ceramic tiles, and concrete backing.
Types of Damage That Can Occur Without Proper Sealing
Without proper sealing, outdoor mosaics are vulnerable to various types of damage, including grout erosion, tile loosening, color fading, and structural deterioration. Staining from dirt, plant debris, and organic growth like mold and algae can also permanently discolor both tiles and grout.
Benefits of Properly Sealed Mosaic Art
Properly sealed mosaics enjoy significantly extended lifespans. Sealing creates a protective barrier that repels water, prevents staining, blocks UV damage, and maintains the vibrant colors of the mosaic artwork. It also enhances the overall appearance by bringing out the natural colors and textures of the materials used.
By understanding the challenges posed by outdoor elements and the benefits of sealing, artists and homeowners can take proactive steps to protect their mosaic art, ensuring it remains a beautiful and integral part of their outdoor space for years to come.
Essential Materials for Sealing Outdoor Mosaics
Outdoor mosaics demand special care, starting with the selection of appropriate sealing materials. To ensure your mosaic art withstands outdoor conditions, it’s crucial to understand the types of sealers and tools needed.
Types of Sealers for Outdoor Use
There are primarily two types of sealers used for outdoor mosaics: penetrating pore sealers and membrane-forming sealers.
Penetrating Pore Sealers
Penetrating pore sealers soak into the pores of materials like grout, stone, and unglazed ceramic, creating an invisible barrier that repels water and stains.
Membrane-Forming Sealers
Membrane-forming sealers create a protective coating on the surface, providing excellent water resistance and often adding a glossy finish. They may slightly darken grout and porous tiles.
Tools and Additional Supplies Needed
Essential tools for the sealing process include clean lint-free cloths, small paintbrushes, foam brushes, rubber gloves, eye protection, and plastic drop cloths. Additional supplies include a spray bottle with clean water and a timer to track drying times.
Choosing the Right Sealer for Different Mosaic Materials
Different mosaic materials require specific sealer types. For instance, glass tiles need minimal sealing, mainly for the grout, while porous materials like unglazed ceramic and natural stone require thorough sealing with penetrating products.
For mixed-media mosaics, you’ll need to select a sealer that works effectively with all components without damaging any of them.
Preparing Your Mosaic Art for Sealing
Before applying a sealer to your mosaic art, it’s crucial to prepare the surface properly. This step is vital for achieving optimal results and ensuring the longevity of your outdoor installation.
Ensuring Your Mosaic is Completely Dry
The mosaic must be completely dry before applying any sealer. This typically means waiting at least 48-72 hours after grouting to ensure that all moisture has evaporated from both the grout and any porous tiles. Attempting to seal a mosaic that still contains moisture can lead to clouding, improper adhesion of the sealer, and potential mold or mildew problems trapped beneath the sealed surface.
Cleaning the Surface Properly
Thoroughly cleaning the entire mosaic surface is essential to remove any dust, dirt, grout haze, or fingerprints that could become permanently sealed if not removed beforehand. Use a pH-neutral cleaner specifically designed for tile and grout cleaning, avoiding acidic or harsh chemical cleaners that might damage delicate mosaic materials or colored grout.

Testing the Sealer in an Inconspicuous Area
Always test your chosen sealer on a small, inconspicuous area of your mosaic to ensure it doesn’t cause unwanted effects like discoloration, cloudiness, or an undesirable finish. The test area should include both tiles and grout to verify how the sealer interacts with all components of your mosaic art.
| Preparation Step | Description | Importance |
|---|---|---|
| Drying | Wait 48-72 hours after grouting | Prevents moisture-related issues |
| Cleaning | Use pH-neutral cleaner | Removes dirt and grout haze |
| Testing | Apply sealer to a small area | Ensures sealer compatibility |
After cleaning, rinse the surface thoroughly with clean water and allow it to dry completely before proceeding with the sealing process. Weather conditions also play a significant role in outdoor sealing projects; aim for a dry day with moderate temperatures (between 50-80°F) and low humidity for optimal sealer application and curing.
Step-by-Step Sealing Process
To ensure your mosaic art withstands outdoor conditions, a proper sealing process is essential. This process involves several critical steps that, when followed correctly, provide maximum protection against the elements.
Applying the First Coat of Sealer
Begin by applying the first coat of sealer using the appropriate tool for your specific product – typically a foam brush, soft cloth, or small paint brush for detailed areas and grout lines. Work in small sections, applying the sealer evenly and making sure to cover all surfaces, with special attention to grout lines which are more porous.
Proper Drying Time Between Coats
Proper drying time between coats is critical. Rushing this process can trap solvents, creating a cloudy appearance and compromising the sealer’s effectiveness. Most sealers require at least 2-4 hours of drying time between applications, but always follow the manufacturer’s instructions.
Applying Multiple Coats for Maximum Protection
Multiple coats provide significantly better protection than a single application. For optimal results, most outdoor mosaics require 2-3 coats. Each subsequent layer builds upon the protection of the previous one, filling in any microscopic pinholes or gaps in coverage.
Final Inspection and Testing
After applying the final coat and allowing it to dry completely, perform a water test by placing a few drops on various areas of the mosaic, including grout lines. Properly sealed surfaces will cause the water to bead up rather than absorb. Conduct a final visual inspection in different lighting conditions to check for any missed spots or uneven application.
- The sealing process requires careful attention to detail and patience.
- Apply the sealer evenly, covering all surfaces thoroughly.
- Ensure adequate drying time between coats as per the manufacturer’s instructions.
Conclusion
To keep your outdoor mosaic art vibrant and intact, proper sealing is essential. Sealing protects your artwork from the elements, ensuring it remains a beautiful addition to your outdoor space for years to come.
Applying multiple coats of a high-quality sealer is a worthwhile investment, as it safeguards your mosaic against water damage and staining. Different mosaic materials have unique sealing requirements, so it’s crucial to research the specific needs of your tiles, grout, and backing materials.
Regular maintenance, including periodic reapplication of sealer, is vital. Most outdoor mosaics benefit from resealing every 1-3 years, depending on exposure conditions. By following these guidelines and documenting your sealing process, you can enjoy your outdoor mosaic art for many years while preserving its beauty and artistic expression.
FAQ
What type of sealer is best for ceramic tiles?
For ceramic tiles, a water-based or solvent-based acrylic sealer is recommended. These sealers are suitable for most ceramic tile applications and provide a clear, non-yellowing finish.
How often should I reapply sealer to my mosaic art?
The frequency of reapplying sealer depends on the type of sealer used and the environmental conditions. Generally, a sealer should be reapplied every 2-5 years, or as needed, to maintain the protective barrier.
Can I use a tile adhesive to attach mosaic tiles to a wooden surface?
No, it’s not recommended to use a tile adhesive directly on a wooden surface. Instead, apply a layer of thinset or a specialized adhesive designed for bonding tile to wood, and ensure the surface is properly prepared.
What is the purpose of grout in a mosaic art piece?
Grout serves several purposes: it fills the gaps between tiles, providing a uniform appearance, and helps to secure the tiles in place. Additionally, grout can add color and texture to the overall design.
How do I clean my mosaic art before applying a sealer?
To clean your mosaic art, use a mild detergent and water to remove dirt and debris. Avoid using harsh chemicals or abrasive materials that can damage the tiles or grout.
Can I apply a sealer to a mosaic art piece that is exposed to direct sunlight?
Yes, but it’s essential to choose a sealer that is specifically designed to withstand UV exposure. Some sealers may yellow or degrade over time when exposed to direct sunlight, so be sure to select a product that is UV-resistant.
What is the recommended drying time between coats of sealer?
The recommended drying time between coats of sealer varies depending on the product and environmental conditions. Typically, it ranges from 15 minutes to several hours, so be sure to follow the manufacturer’s instructions.
Can I use a stone sealer on glass mosaic tiles?
No, stone sealers are not suitable for glass mosaic tiles. Instead, use a sealer specifically designed for glass or a universal sealer that is compatible with multiple materials, including glass.