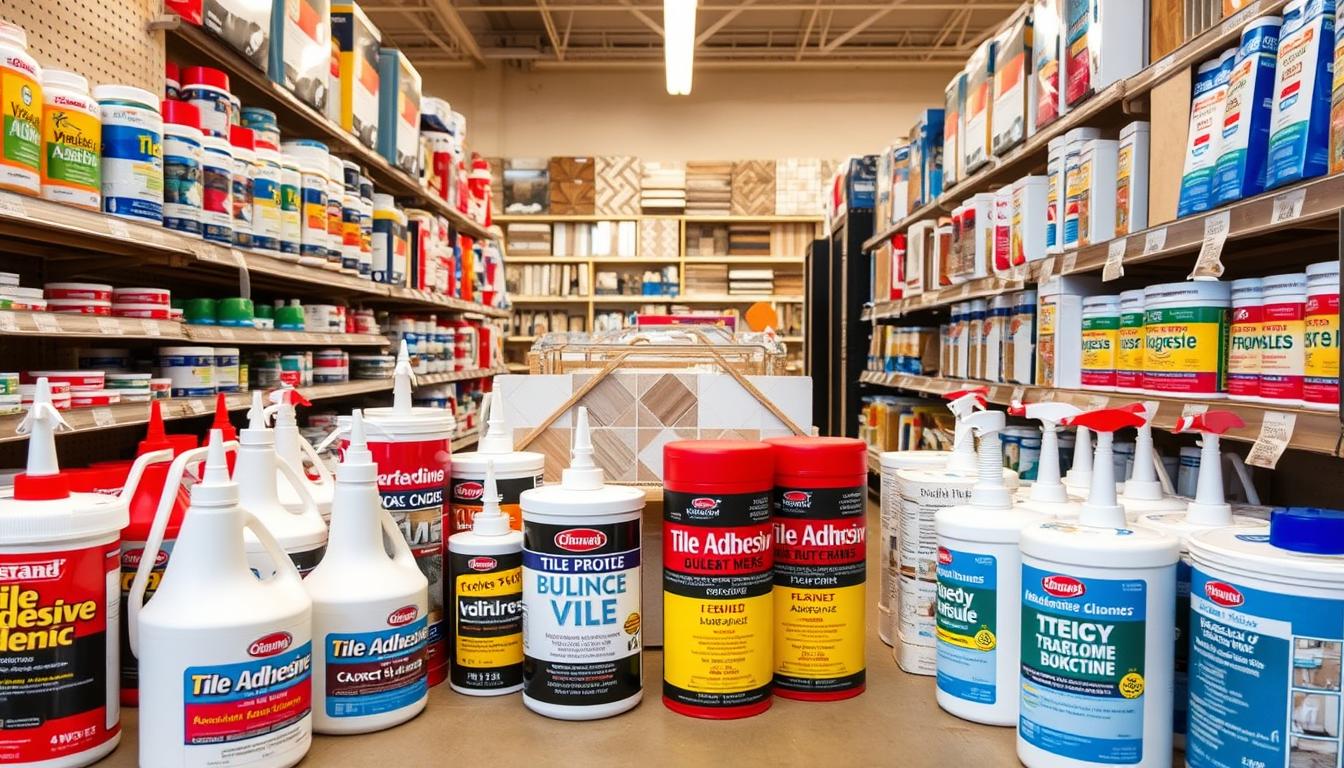
When it comes to home improvement, selecting the right materials is crucial for a successful DIY project. Installing tiles can add style and convenience to a home, but using the wrong mortar or glue can lead to durability issues.
For a long-lasting result, it’s essential to choose the appropriate tile adhesive. Different types of adhesives, such as thinset mortar and epoxy-based products, are available for various tiling projects. Understanding the specific requirements of your project, including the surface type and environmental conditions, will help you select the right product.
By considering these factors, DIY enthusiasts can ensure a professional finish for their home improvement projects, whether it’s a kitchen backsplash, bathroom floor, or outdoor patio.
Understanding Tile Adhesives and Their Importance
Understanding the role of tile adhesive is fundamental to achieving a durable and visually appealing tile installation. Tile adhesive, also known as tile cement or tile glue, is a critical component in any tiling project.
What Is Tile Adhesive?
Tile adhesive is a binding agent used to secure tiles to various surfaces, including walls and floors. It is formulated to provide a strong bond between the tile and the surface, ensuring that the tiles remain in place over time. For best results, surfaces should be clean and free of dust or debris before applying this wall tile glue.
Why Using the Right Adhesive Matters
Using the right tile adhesive is crucial for the longevity and appearance of the tiled area. The wrong adhesive can lead to premature failure, causing tiles to detach or become loose. For more detailed information on tile adhesives, you can visit The Tilers Hub.
Common Tiling Mistakes to Avoid
Several common mistakes can compromise the effectiveness of tile adhesive. These include:
- Using an adhesive not suited for the specific tile material or installation environment.
- Failing to properly prepare the surface by cleaning, leveling, or priming.
- Applying adhesive incorrectly, either too thick, too thin, or allowing it to skin over before setting tiles.
- Not accounting for the weight and size of tiles when selecting an adhesive.
- Rushing the curing process; make sure to allow sufficient time for the adhesive to set before grouting or using the tiled area.
By avoiding these mistakes and selecting the appropriate tile adhesive, you can ensure a successful tiling project that is both durable and aesthetically pleasing.
Factors to Consider When Selecting Tile Adhesive
To ensure a long-lasting tile installation, it’s essential to consider various factors when selecting a tile adhesive. The right choice depends on several critical elements that determine the performance and durability of the tile installation.
Project Location: Indoor vs. Outdoor
The location of the tiling project is a crucial factor in selecting the appropriate adhesive. Indoor projects typically require different adhesives compared to outdoor projects, which are exposed to various weather conditions. Outdoor areas are subject to temperature fluctuations, rain, and sunlight, necessitating adhesives with higher resistance to these factors.

Surface Type and Condition
The type and condition of the surface where tiles will be installed also play a significant role in adhesive selection. Different surfaces, such as concrete, plywood, or existing tiles, require specific adhesives that can bond well with them. The surface condition, whether it’s level, clean, or damaged, also affects the choice of adhesive.
Tile Material and Size
The material and size of the tiles are additional factors to consider. Various tile materials, such as ceramic, porcelain, or natural stone, have different requirements for adhesives. Larger tiles, in particular, may need specialized adhesives to ensure they are properly supported and bonded to the surface.
Moisture and Heat Exposure
Areas with constant water exposure, such as shower floors or tub surrounds, require waterproof adhesives. Thinset is ideal for such applications due to its moisture- and heat-resistant properties, making it suitable for tiling showers, countertops, and bathtubs. In contrast, mastic is not recommended for areas with high moisture or heat, such as shower pans, outdoor patios, or swimming pools.
Types of Tile Adhesive for Different Projects

Tile adhesive is not a one-size-fits-all solution; various types cater to specific needs and applications. The right adhesive ensures a strong bond between the tile and the surface, enhancing the longevity of the project.
Overview of Available Options
The market offers several types of tile adhesives, including thinset, mastic, and epoxy. Thinset, a mixture of cement, sand, and water, is popular for its strength and durability. Premixed thinset comes in tubs and is ready to use, making it a convenient option for DIY projects. Epoxy, known for its high strength and resistance to chemicals, is more challenging to mix and apply.
Matching Adhesive Type to Project Requirements
Selecting the right adhesive depends on the project’s location, surface type, and tile material. For instance, thinset is ideal for ceramic and porcelain tiles, while epoxy is better suited for areas exposed to heavy wear and tear or chemicals. Mastic, being a ready-to-use adhesive, is convenient for smaller projects or repairs.
Cost Considerations
Adhesive costs vary significantly, with pre-mixed products generally being more expensive. When budgeting, consider not just the initial cost but also the coverage rate and potential waste. More expensive adhesives may offer time-saving benefits or enhanced performance. Customer reviews often highlight products that balance cost with performance, making them a valuable resource.
Some key points to consider when evaluating the cost of tile adhesives include:
- Adhesive costs vary significantly, with pre-mixed products generally commanding premium prices for their convenience.
- When budgeting for your project, consider not just the initial product cost but also the coverage rate and potential waste.
- More expensive adhesives often offer time-saving benefits or enhanced performance that may justify their higher price point.
- Customer reviews often award more stars to products that balance cost with performance, making them a valuable resource when comparing options.
- The cheapest option isn’t always the most economical in the long run, as quality adhesives reduce the risk of costly failures and rework.
Thinset Tile Mortar: The Versatile Option

Thinset tile mortar is a fundamental component in tile installation, offering versatility and strength. It creates a strong bond once it dries, securing tiles firmly. This makes it a great choice when installing tile floors in any room.
Standard vs. Premixed Thinset
Thinset mortar is available in both standard and premixed forms. Standard thinset requires mixing with water or a latex additive, allowing for customization based on the project’s needs. Premixed thinset, on the other hand, is ready to use straight from the container, offering convenience and consistency.
Advantages of Thinset Mortar
Thinset mortar excels in various applications due to its moisture- and heat-resistant properties. It is ideal for tiling showers, countertops, bathtubs, or any other area that gets too wet or hot. Additionally, thinset is the go-to option for outdoor applications, such as patios and swimming pools, due to its ability to withstand weather exposure and temperature fluctuations.
The benefits of using thinset mortar include its ability to excel in wet environments like shower floors and walls, support large format tile installations, and withstand high-traffic commercial and residential floor applications.
Limitations and Challenges
While thinset mortar is highly versatile, it does have some limitations. It requires proper mixing and application to achieve the desired bonding strength. Additionally, thinset can be messy to work with, and it may not be suitable for all substrate types without proper preparation.
Best Applications for Thinset
Thinset mortar is best used in applications where its strengths can be fully utilized, such as in wet areas, outdoor installations, and large format tile installations. It is particularly beneficial for situations requiring adhesion to difficult substrates like concrete or properly prepared existing tile surfaces.
Tile Mastic: When to Use This Ceramic Tile Adhesive

Among various tile adhesives available, tile mastic stands out due to its sticky, glue-like nature that helps hold tiles in place during installation. This characteristic makes it particularly useful for certain types of tiling projects.
Composition and Properties
Tile mastic is a non-cementitious adhesive, typically made from a mixture of polymers and resins. Its composition gives it a strong initial grab, allowing it to hold tiles in place effectively on vertical surfaces without the tiles sagging or slipping. This property is especially beneficial for installations like kitchen backsplashes and wall tiles.
Pros and Cons of Mastic
The advantages of using tile mastic include its ease of application, strong initial adhesion, and the ability to hold tiles in place on vertical surfaces. However, it also has some drawbacks. Mastic is not as durable as some other adhesives, such as thinset, and it is not suitable for areas exposed to excessive moisture or heat.
On the positive side, mastic is much easier to remove than cement-based adhesives like thinset, making it a good choice for renovation projects where old tiles may need to be removed in the future.
Ideal Projects for Mastic
Tile mastic is well-suited for several types of projects, including:
- Kitchen backsplash installations, where its strong initial grab and ease of application on vertical surfaces are advantageous.
- Small mosaic tile projects, as mastic holds the small pieces in place without slippage.
- Wall tile installations in dry areas, such as living spaces and bedrooms, where water exposure is minimal.
- Renovation projects where the ease of removing old tiles is a consideration.
- Decorative mosaic accents and borders where precise placement is important and dry use conditions are expected.
Epoxy Tile Mortar: The Professional-Grade Solution

Epoxy tile mortar offers unparalleled strength and durability, making it ideal for challenging environments. This professional-grade solution is versatile, suitable for a wide range of applications from floors to walls and ceilings.
Components and Mixing Process
Epoxy tile mortar is a two-component system consisting of a resin and hardener, which are mixed together before application. The mixing process requires precision to ensure the correct ratio of components, which is crucial for achieving the desired bonding properties.
Strength and Durability Benefits
The epoxy mortar provides an exceptionally strong bond, superior to traditional adhesives like thinset and mastic. It is also completely resistant to moisture, water, and most chemicals, making it perfect for environments that are exposed to harsh conditions, such as commercial kitchens and swimming pools.
Challenges for DIY Applications
While epoxy tile mortar offers numerous benefits, its application can be challenging for DIYers. The mixing process requires accuracy, and the mortar has a limited working time, making it less forgiving than other adhesives. Additionally, epoxy mortar is generally more expensive than other options.
When to Choose Epoxy Mortar
Epoxy mortar is the best choice for projects that demand high chemical resistance, durability, and a strong bond. Ideal applications include commercial kitchen floors, continuous-use shower environments, and installations involving non-traditional surfaces like metal or fiberglass.
Specialty Adhesives for Specific Tile Applications
Specialized tile adhesives are crucial for ensuring the longevity and aesthetic appeal of various tile installations. Different tile materials and applications require unique adhesive properties to achieve the best results.
Glass Tile Adhesives
Glass tiles require adhesives that are not only strong but also visually compatible, as the adhesive can be visible through the transparent or translucent glass. White or gray adhesives are typically used to either blend with or contrast against the glass tiles. The adhesive should have a high level of flexibility to accommodate the slight movements of the substrate without cracking.
Natural Stone Adhesives
Natural stone tiles, such as marble, granite, and slate, demand adhesives that can handle their weight and porosity. The adhesive should be flexible to accommodate the natural movement of the stone and have a suitable color to minimize visibility through lighter stones. Epoxy-based adhesives are often recommended for natural stone due to their high strength and durability.
Large Format Tile Adhesives
Large format tiles require specialized adhesives that can support their size and weight. These adhesives feature non-slump formulations and often include leveling properties to compensate for minor substrate irregularities. They also have higher polymer content for flexibility and extended open times for proper tile positioning.
| Tile Type | Adhesive Requirement | Key Characteristics |
|---|---|---|
| Glass Tile | Visually compatible, flexible | White or gray color, high flexibility |
| Natural Stone | Strong, flexible, suitable color | Epoxy-based, high strength, durable |
| Large Format Tile | Non-slump, leveling properties | Higher polymer content, extended open time |
Step-by-Step Guide to Choosing the Right Tile Adhesive
To achieve professional-looking results, it’s vital to select a tile adhesive that meets your project’s specific needs. Choosing the right tile adhesive involves several key considerations.
Assessing Your Project Requirements
Begin by assessing your project requirements. Consider the type of tiles you’re using, the surface you’re working with, and the environmental conditions the tiles will be exposed to.
- Compare manufacturer specifications against your project requirements to identify products that meet all your technical needs.
- Read customer reviews and star ratings to identify adhesives that consistently perform well in applications similar to yours.
Evaluating Surface Conditions
Evaluating the surface conditions is crucial for selecting the right tile adhesive. Different surfaces require different types of adhesives.
- Consider the surface type and condition to determine the most suitable adhesive.
- Ensure the surface is clean, dry, and free of old adhesive or other contaminants.
Considering Environmental Factors
Environmental factors such as moisture, heat, and exposure to chemicals can significantly impact the performance of your tile adhesive.
- Consider the level of moisture and heat exposure in your project area.
- Choose an adhesive that is resistant to the environmental conditions it will be exposed to.
Making the Final Selection
Making the final selection involves balancing performance characteristics, ease of use, and cost.
- Consider value rather than just price, as a slightly more expensive product that works great may save money in the long run.
- Consult with professionals or experienced DIYers when uncertain, as their practical experience often reveals insights not covered in product literature.
- Make your final selection based on the best balance of performance characteristics, ease of use, and cost for your specific situation.
Application Tips for Different Tile Adhesives
To achieve a professional-looking tile installation, understanding how to apply tile adhesive is essential. The process involves several critical steps that ensure a strong bond between the tile and the substrate.
Tools and Materials Needed
Before starting the tile installation, gather all necessary tools and materials. This includes the chosen tile adhesive, a notched trowel, a mixing bucket, and a mixing stick. For larger tiles or specific adhesive types, additional tools like a back-butter trowel may be required.
Proper Mixing Techniques
Proper mixing of the tile adhesive is crucial for its effectiveness. Follow the manufacturer’s instructions for the correct water-to-adhesive ratio. Mix the adhesive thoroughly until it reaches a uniform consistency. For thinset adhesive, it’s essential to mix it to the right consistency to avoid a too dry or too wet mix, which can affect the bonding strength.
Application Methods for Best Results
When applying tile adhesive, start by using the flat side of the trowel to create a thin bond coat on the substrate. Then, use the notched side to add more adhesive, creating ridges that help in achieving a strong bond. For floor tiles larger than 12 inches, consider using the back-butter technique to ensure full coverage. When installing wall tiles, work in small sections and frequently check for proper adhesive coverage. Allow the adhesive to dry for the recommended time, typically 24-48 hours for thinset, before grouting or walking on the tiles.
- Apply adhesive in horizontal strokes for vertical applications to resist slippage.
- Use the back-butter technique for large floor tiles to ensure full coverage.
- Work in small sections for wall tiles and check adhesive coverage frequently.
Troubleshooting Common Tile Adhesive Problems
Despite careful planning, tile adhesive issues can still occur, but there are ways to address them effectively. Understanding how to troubleshoot these problems is crucial for a successful tiling project.
Adhesive Not Setting Properly
When tile adhesive fails to set properly, it can lead to loose tiles and a compromised installation. This issue often results from incorrect mixing, inadequate coverage, or unfavorable environmental conditions. Ensuring the adhesive is mixed according to the manufacturer’s instructions and applying it in the right amount is crucial. Additionally, maintaining a consistent temperature and humidity level during the setting process can help prevent this problem.
Tiles Slipping or Sagging
Tiles slipping or sagging is another common issue that can arise during tile installation. This typically occurs when the adhesive has not been given enough time to set or when the tiles are not properly supported. Using spacers and ensuring that the adhesive is allowed to dry completely before grouting can mitigate this issue. For larger tiles, additional support mechanisms may be necessary.
Dealing with Uneven Surfaces
Uneven surfaces can pose a significant challenge when installing tiles. Thinset can be used to address minor irregularities, but severely uneven surfaces require proper substrate preparation. Self-leveling compounds can be an effective solution for creating a flat surface before tile installation. In some cases, incorporating design elements like borders or patterns can help disguise slight unevenness.
| Problem | Solution |
|---|---|
| Adhesive not setting | Check mixing instructions, ensure proper coverage, and maintain favorable environmental conditions. |
| Tiles slipping or sagging | Use spacers, allow adhesive to dry completely, and consider additional support for larger tiles. |
| Uneven surfaces | Use thinset for minor irregularities, self-leveling compounds for more significant unevenness, or design elements to disguise imperfections. |
Conclusion
Selecting the correct tile adhesive is essential for a durable and long-lasting tiling project. At Downright Tile and Renovations, we’ve spent years helping homeowners throughout the greater Kansas City area with their remodeling needs, including tile installation, replacement, and repair in various applications such as floors, walls, kitchens, bathrooms, and more.
The right tile adhesive is critical for the longevity and performance of your tiling project. Different adhesive types, including thinset, mastic, and epoxy, are suited for specific applications, from shower installations to kitchen backsplash projects. Properly assessing your project requirements and substrate conditions will save you from costly repairs in the end.
Customer reviews offer valuable insights into product performance, with helpful reviews detailing specific applications and results over time. For complex home improvement projects, consulting professionals may be the most cost-effective approach. The variety of specialized adhesives for glass, mosaic, and large format tiles makes it easier to find the perfect product for your needs.
Whether you’re installing a simple floor or creating an elaborate shower design, the right adhesive is the foundation upon which the entire project rests. Investing in quality adhesive will pay dividends through extended performance and reduced need for repairs. With proper selection and application, your tiling project can remain beautiful and functional for many years, enhancing both the value and enjoyment of your home.
FAQ
What is the best tile adhesive for a kitchen backsplash project?
For a kitchen backsplash, a premixed thinset or mastic is often recommended due to its ease of use and strong bond. However, if you’re working with glass tiles, consider a specialized glass tile adhesive for optimal results.
Can I use the same adhesive for both indoor and outdoor projects?
No, it’s not recommended to use the same adhesive for both indoor and outdoor projects. Outdoor projects require adhesives that are more resistant to weather conditions, such as extreme temperatures and moisture. Look for adhesives labeled as “indoor/outdoor” or “weather-resistant” for exterior applications.
How long does it take for tile adhesive to dry?
The drying time for tile adhesive varies depending on the type and environmental conditions. Typically, thinset mortar takes 24 hours to dry, while mastic can dry within a few hours. Always follow the manufacturer’s instructions for specific drying times.
Can I use tile adhesive on old tiles or surfaces?
It’s generally not recommended to apply new tile adhesive over old tiles or surfaces. The old surface must be properly cleaned, and any old adhesive or debris removed to ensure a strong bond between the new tile and the surface.
What is the difference between thinset and mastic?
Thinset is a cement-based adhesive, ideal for most tile installations, especially in areas exposed to moisture. Mastic, on the other hand, is a resin-based adhesive, suitable for dry areas and often used for ceiling and wall applications.
How do I choose the right tile adhesive for my project?
To choose the right tile adhesive, consider factors such as project location, surface type, tile material, and exposure to moisture and heat. Assess your project requirements, evaluate the surface conditions, and consider environmental factors to make an informed decision.
Can I use epoxy mortar for a DIY project?
Epoxy mortar is a professional-grade solution that requires precise mixing and application. While it’s possible to use epoxy mortar for a DIY project, it’s recommended for experienced individuals or professionals due to its complexity and high cost.